


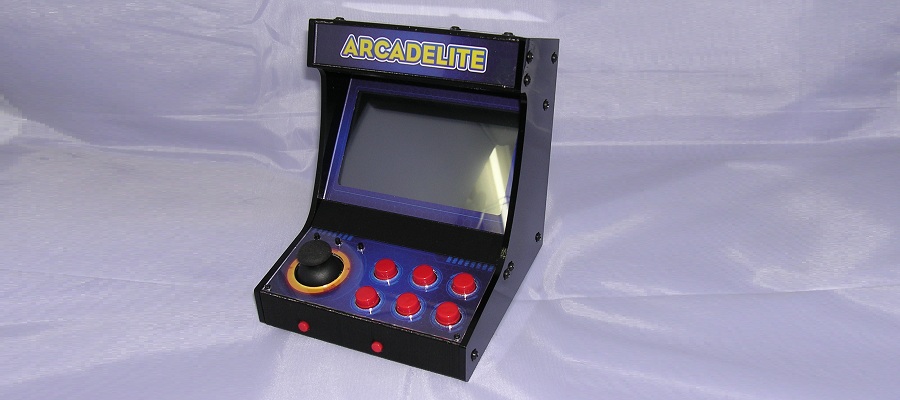

Arcade machine
Features

Description
Product(LxWxH): 130 x 160 x 159 mm
Product plus box: 150 x 180 x 180 mm
Product: 800 g
Product with packing: 1.04 kg
Raspbarry Pi 3 Model B
16GB Class 10 SD Card
Stereo Class D amplifier
Two 40mm, 3W speaker
5 inch TFT LCD
Resolution, 800 x 600
HDMI input built-in
Acrade panel layout
2-Axis joystick potentiometer
Six silent push buttons
Coin & Start buttons
USB : USB 2.0 x 3, one USB for internal controller reserved.
Ethernet : 10/100 RJ45
Wireless : 802.11n
Micro-USB power source
5V, 800mA
* Suggest use Micro USB 5V 2.5A power adapter *
Horizontal video game arcade cabinet
Precision laser Cut acyrlic cabinet
3D printed body parts
Awesome artwork cabinet
PLA Material
Acrylic

Software 
Description: relive all your childhood classics with the latest version of RetroPie for the Raspberry Pi 3
Consisting of a huge selection of pre-installed emulators for a huge range of gaming systems covering PC / MAC / Console / Arcade.
Pre-Configured for over 5,000 popular titles including game info.
Plug & Play friendly, Controls pre-configured
Pre-Installed Emulators: SNES, Megadrive / Genesis, Nintendo 64, PSX, Master System, NES, Dreamcast, Commodore 64, Atari, Game Boy / Colour / Advanced, Game Gear, MAME, Neo Geo, PSP, Sega Saturn + More
Roms / Games: This package does not come with any illegal roms / games, nor do we sell. If you wish to install roms / games yourself a quick google search will get you going.


Hand book
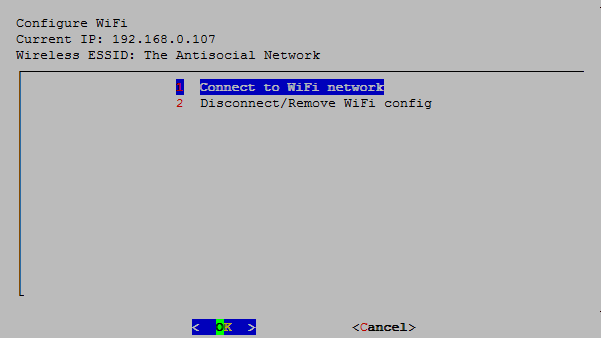
Connect to Wifi Network
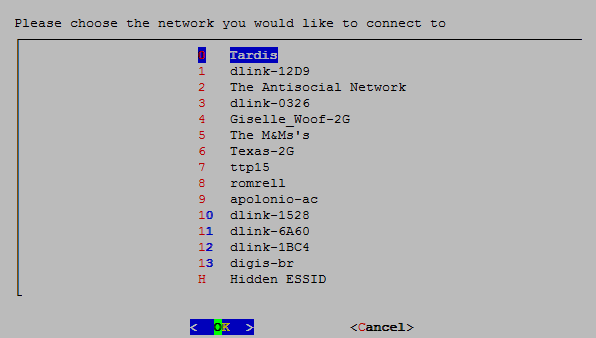
Choose your SSID from a list
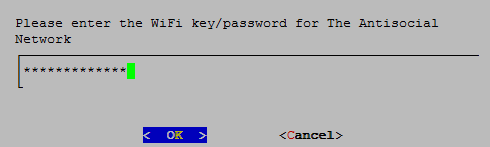
Type your Wifi Password (may take a moment to connect)
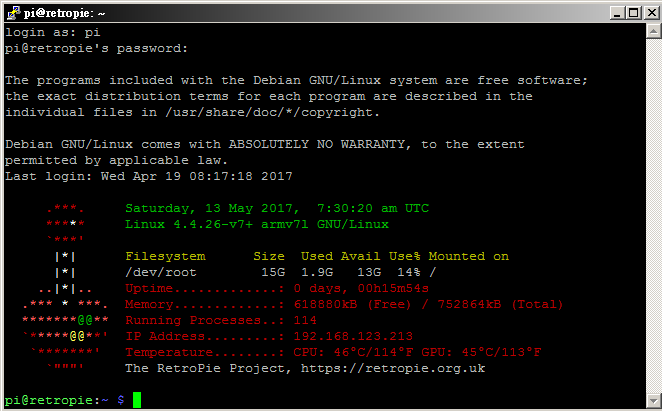
Once configured you will see your IP address
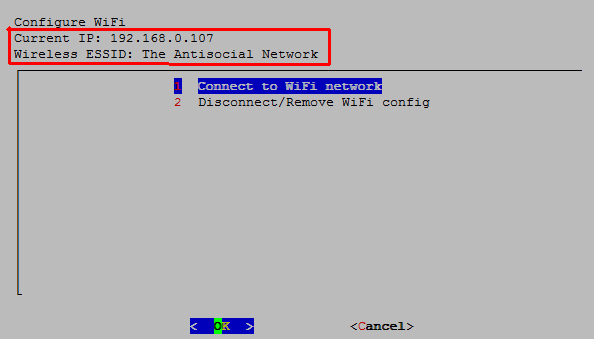
Now you can access Wifi Network. More information see this page
Due to the nature/complexity of Copyright/Intellectual Property Rights Law, which differs significantly from Country to Country, ROMs cannot be provided with RetroPie and must be provided by the user. You should only have ROMs of games that you own.
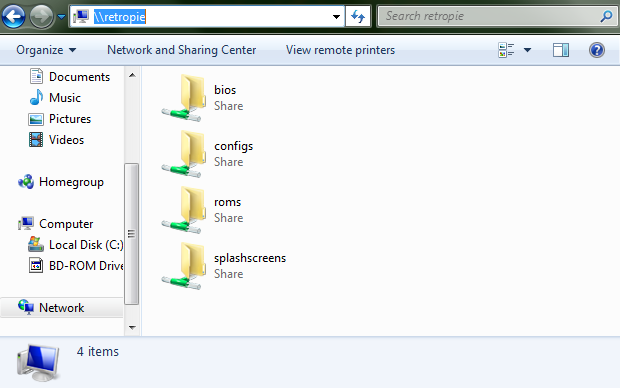
There are three main methods of transferring roms: USB , SFTP and Samba-Shares.
FTP config
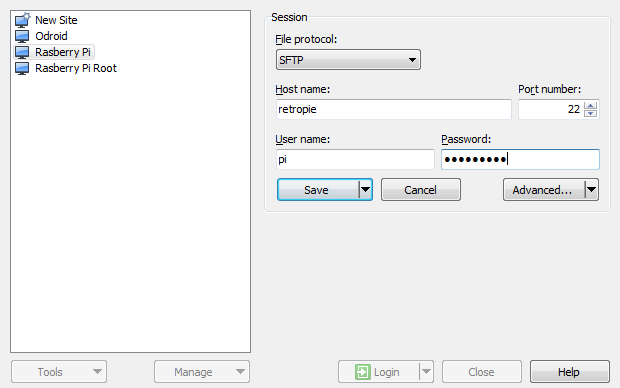
Default username: pi
Default Password: raspberry
You can also log in as root if you wish to change more files than just the roms, but you first need to enable the root password which is explained here

Guide: Getting Started with Arcade Emulation
|
System |
Recommended MAME Emulator |
Recommended FB Alpha Emulator |
|---|---|---|
|
Pi 2 and Pi 3 |
lr-mame2003 |
lr-fbalpha |
|
Pi 1 and Pi Zero |
mame4all ( NOT lr-mame4all) |
pi-fba |
Guide: Arcade games and how to play them, A non-technical MAME / FBA tutorial
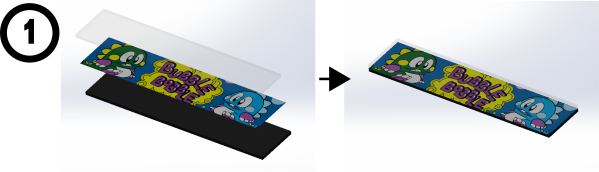
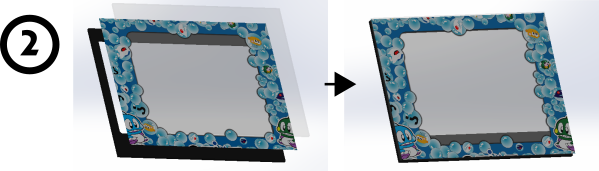
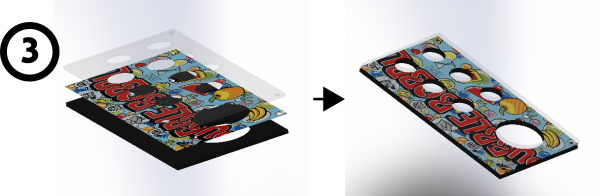
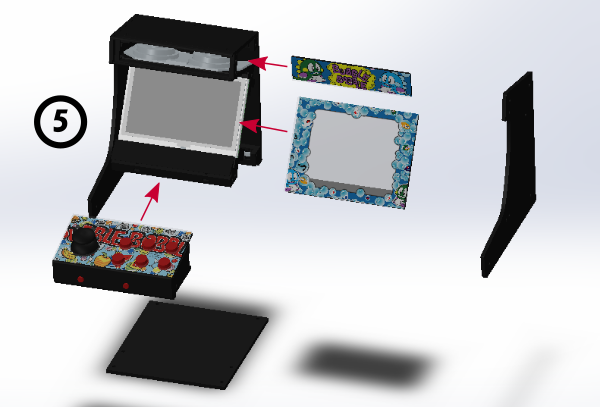
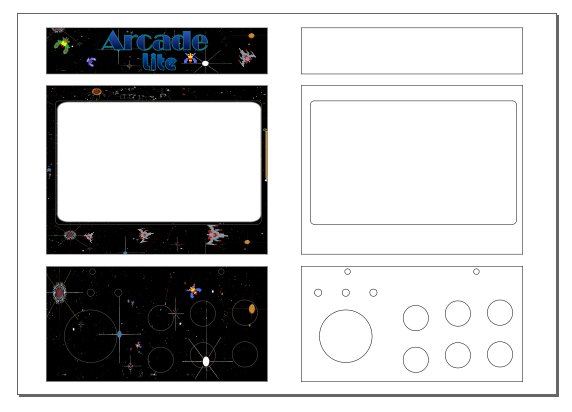
Artwork installation
Arcade Lite structure

Marquees artwork install
bezels artwork install
control panel artwork install
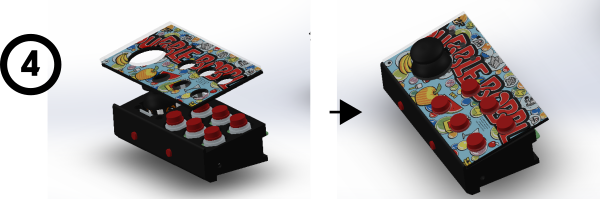
join together
Optional Network cable and USB game pad or others plug-in

You may configure extra 1 to 3 joypads for multi-play

Or configure extra joypad, keyboard and mouse for system enhancement.
ARCADE emulator Key buttons define
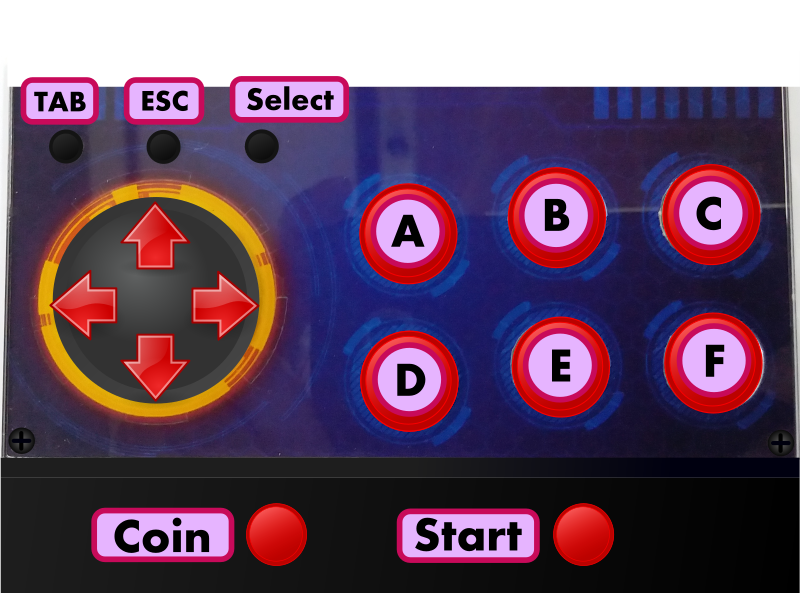
This key is ARCADE emulate and follow to mame standard Player 1 default keys.
Key Panel Mapping

This key panel is emulate a USB keyboard and the key mapping is follow to mame standard Player 1 default keys.
Arcade lite internal connection
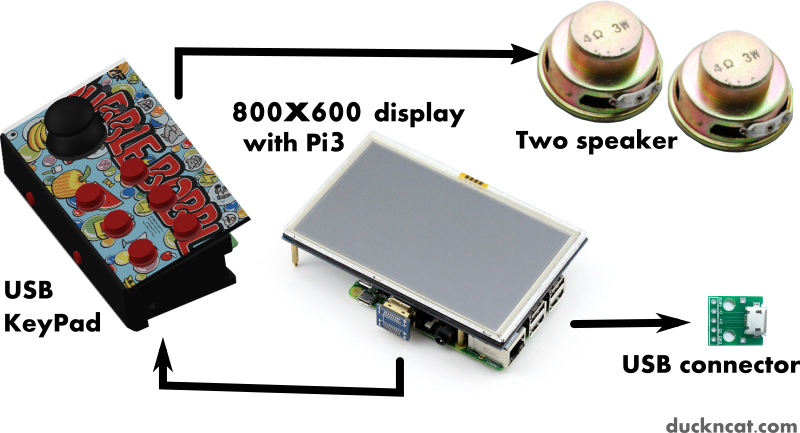
Module Raspberry PI connect to display module through HDMI port
two speaker, USB connector module and USB Keypad (USB Keybroad emulation module).

USB Keypad(USB Keybroad emulation module) connection

raspberry P3 b+ connection

raspberry P3 connection

speaker and usb socket connection
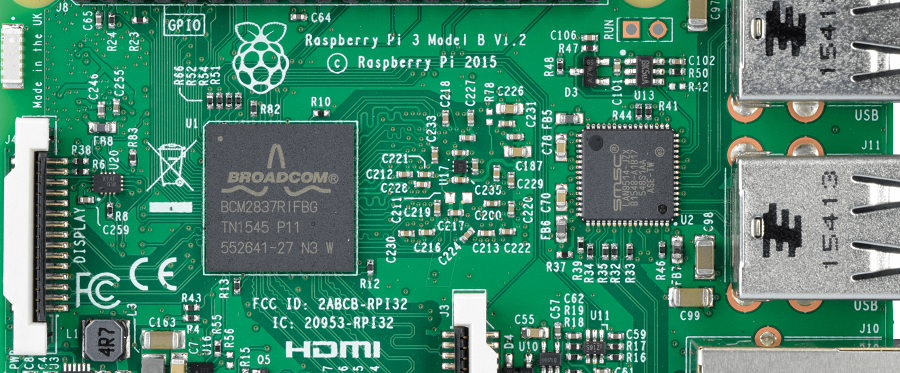
Raspberry Pi 3 Model B+ board
|
Processor |
Quad Core 1.4GHz Broadcom BCM2837B0, Cortcx-A53 64bit CPU |
|
WIFI&Bluetooth |
BCM43143 WiFi and Bluetooth Low Energy (BLE) on board |
|
USB |
4 USB 2.0 Ports |
|
Video Output |
HDMI and Composite |
|
Sound |
L/R Stereo |
|
Memory |
1GB Ram |
|
Operating System |
Uses micro SD card slot to load O/S |
|
Digital interfaces |
2 onboard ribbon slots for Camera and Display |
|
GPIO |
40
GPIO pins, backwards compatible to B and B+
board |
Re-config retropie
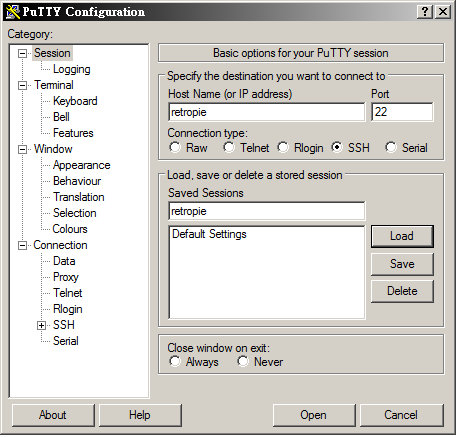
Login retropie by telnet or terminal software.
Edit "retroarch.cfg" file on "/opt/retropie/configs/all"
sudo nano /opt/retropie/configs/all/retroarch.cfg
input_exit_emulator = escape	  # <- change the exit key to escape
#input_enable_hotkey = "rctrl"	  # <- remark the hotkey function
input_menu_toggle = "a"		  # <- remap "z" to "a" if remark it, the game speeded up.
Write file : Ctrl+O
Exit editor : Ctrl+X
Edit "config.txt" file on "/boot"
sudo nano /boot/config.txt
# uncomment to force a HDMI mode rather than DVI. This can make audio work in
# DMT (computer monitor) modes
#hdmi_drive=2
hdmi_group=2                    #<-- Add lines to set 800x600 display
hdmi_mode=1                     #<-- Add lines
hdmi_mode=87                    #<-- Add lines
hdmi_cvt 800 480 60 6 0 0 0     #<-- Add lines
avoid_warnings=1                #<-- Add lines to removes the warning overlay.
Write file : Ctrl+O
Exit editor : Ctrl+X
Configuring Runcommand via RetroPie-Setup
Following step for disable Launch menu when MAME run.
The runcommand configuration option in the RetroPie area of Emulation Station.
Reduce "hiss" sound
Login retropie by telnet or terminal software.
Edit "config.txt" file on "/boot"
sudo nano /boot/config.txt
insert "disable_audio_dither=1" command line at the bottom of the file.
dtparam=audio=on
gpu_mem_256=128
gpu_mem_512=256
gpu_mem_1024=256
overscan_scale=1
disable_audio_dither=1            # <- Add command line for reduce "hiss sound"
Write file : Ctrl+O
Exit editor : Ctrl+X
Disable "state slot +/-" and "fast forward"
Login retropie by telnet or terminal software.
Edit "retroarch.cfg" file on "/opt/retropie/configs/all"
sudo nano /opt/retropie/configs/all/retroarch.cfg
1. Remark line input_state_slot_increase = "right"
2. Remark line input_state_slot_decrease = "left"
3. Modify line input_toggle_fast_forward = f10
....
# State slots. With slot set to 0, save state name is *.state (or whatever defined on commandline).
# When slot is != 0, path will be $path%d, where %d is slot number.
# input_state_slot_increase = "right"  # remark this line
# input_state_slot_decrease = "left"   # remark this line

# Toggles between fast-forwarding and normal speed.
input_toggle_fast_forward = f10        # modify key "space" to key f10
....
Write file : Ctrl+O
Exit editor : Ctrl+X
Download
Artwork
SD card Image
